NodeJS Express SocketIO – Chat message and send image
When it comes to NodeJS, Realtime must be thought of. Realtime here is to process the communication from client to server in real time.
NodeJS is an open source code widely used by thousands of programmers around the world. NodeJS can run on many different operating systems from Windows to Linux, OS X so that is also an advantage. NodeJS provides rich libraries in different form of Javascript Module which simplify programming and minimize time.
Here I will introduce the structure of realtime chat message application using NodeJS combined Express, Socket IO consists of two parts: server side, client side.
1. First, create a folder containing your source code and install modules.
– Create a folder containing your source code.
mkdir NodeJs-Express-SocketIO-SendImage
– Run [npm init] to initialize the source file, package.json. Select the js code file is index.js
cd NodeJs-Express-SocketIO-SendImage
npm init
– Install the module for use in NodeJS, it is: express ejs socketio
npm install express ejs socketio
– Now the content of your package.json file looks like this:
{
“name”: “NodeJs-Express-SocketIO-SendImage”,
“version”: “1.0.0”,
“description”: “”,
“main”: “index.js”,
“scripts”: {
“test”: “echo \”Error: no test specified\” && exit 1″
},
“author”: “”,
“license”: “ISC”,
“dependencies”: {
“ejs”: “^3.1.6”,
“express”: “^4.17.1”,
“socketio”: “^1.0.0”
}
}
– Create a public folder to store js and images files after being uploaded.
mkdir public
cd public
mkdir js
mkdir uploads
– Copy jquery.min.js to public/js folder or you can get it from cdn jquery
– Your code directory will now look like this:

Source path
2. Server side NodeJS
– In the index.js file:
var express = require (‘express’);
var app = express();
var fs = require(‘fs’);app.use(express.static(__dirname + ‘/public’));
app.set(“view engine”, “ejs”);
app.set(‘views’, ‘views’);var server = require(‘http’).Server(app);
var io = require(‘socket.io’)(server);
const port = process.env.PORT || 8080;
server.listen(port, () => console.log(`Listen on port ${port}…`));io.on(‘connection’, function (socket) {
console.log(‘Connection ID: ‘ + socket.id);
socket.on(‘disconnect’, function () {
console.log(‘Disconect ID: ‘ + socket.id);
});// The server listens to data from the client
socket.on(‘Client-sent-data’, function (data) {
// After listening to data, server emit this data to all clients
io.sockets.emit(‘Server-sent-data’, data);
});// Handle image
socket.on(“sendImage”, function(data){
var guess = data.base64.match(/^data:image\/(png|jpeg);base64,/)[1];
var ext = “”;
switch(guess) {
case “png” : ext = “.png”; break;
case “jpeg” : ext = “.jpg”; break;
default : ext = “.bin”; break;
}
var savedFilename = “/uploads/” + randomString(10)+ext;
fs.writeFile(__dirname + “/public” + savedFilename, getBase64Image(data.base64), ‘base64’, function(err) {
if (err !== null)
console.log(err);
else
io.sockets.emit(“receiveImage”, {
path: savedFilename,
});
console.log(“Send image success!”);
});
});
})app.get(‘/’, function(req, res) {
res.render(‘home’);
})function randomString(length)
{
var text = “”;
var possible = “ABCDEFGHIJKLMNOPQRSTUVWXYZabcdefghijklmnopqrstuvwxyz0123456789-_”;for( var i=0; i < length; i++ ) {
text += possible.charAt(Math.floor(Math.random() * possible.length));
}return text;
}function getBase64Image(imgData) {
return imgData.replace(/^data:image\/(png|jpeg|jpg);base64,/, “”);
}
3. Client side NodeJS
– Use ejs to display Client side content. In the views folder, create home.ejs file
<!DOCTYPE html>
<html>
<head>
<title>NodeJS Express SocketIO – Chat message & send image</title>
<script type=”text/javascript” src=”js/jquery.min.js”></script>
<script type=”text/javascript” src=”socket.io/socket.io.js”></script><script type=”text/javascript”>
var socket = io(‘http://localhost:8080’);// The client recevie the data from the server
socket.on(‘Server-sent-data’, function(data) {
$(‘#show-message’).append(‘<p>’ + data + ‘</p>’);
});// The client send data to the server
$(document).ready(function () {
$(‘#send’).on(‘click’, function () {
var message = $(‘#message’).val();
socket.emit(“Client-sent-data”, message);
$(‘#message’).val(”);
document.getElementById(“message”).focus();
})})
// Handle image
window.onload = function() {
document.getElementById(“file”).addEventListener(“change”, function(){
submitImage();
});
};function submitImage(){
var selector = document.getElementById(“file”);
var img = document.getElementById(“preview”);var reader = new FileReader();
reader.onload = function (e) {
// img.src = e.target.result;
// client send
socket.emit(“sendImage”, {base64:e.target.result});
}
reader.readAsDataURL(selector.files[0]);
}// Client receive
socket.on(‘receiveImage’, function(data){
// document.getElementById(“showImage”).src = data.path;
var img = ‘<img id=”showImage” src=”‘ + data.path + ‘” width=”100″/>’;$(‘#show-message’).append(img);
});
</script>
</head><body style=”width: 500px; margin: 0 auto;”>
<h2>Chat messages</h2>
<div id=”show-message”></div>
<div>
<p>
<textarea id=”message” rows=”5″ style=”width: 100%”></textarea>
</p>
<p>
Choose image:
<input id=”file” type=”file”>
<img id=”preview” width=”100″></img>
</p><button id=”send”>Send message</button>
</div>
</body>
</html>
And run in the browser:

Client side
4. Run demo NodeJS Express SocketIO, chat message and send image
– Now you run the web server using command: node index.js
node index.js
– Open two browsers to test, type in a message and choose a picture to send. When sending a message and selecting a photo in one of the screens, the received screen is also displayed

Result chat message
– In your command prompt
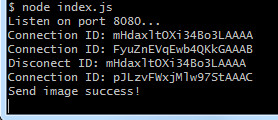
Result in console log
You check in the public/uploads folder, the images are saved.
Hope you guys get the basics of NodeJS, SocketIO and build yourself a simple real time app.


Your comment